When I heard that the latest book by my former colleague Graham Rice was on dry shade, I was intrigued. Dry shade is a problem that most gardeners encounter at one time or another, whether you have a small urban plot or a large country garden. There is always one tricky area in a rain shadow - caused by a wall, or a tree, or next door's shed or whatever.
I asked Graham to write a piece for the Independent Magazine about this universal problem (you can read it here) and, of course, I was keen to scrutinise the book itself.
There are three key pieces of advice. You can try each one individually, or you can combine them in a sort of belt-and-braces attack on the problem.
My particular problem area was on the left-hand side of my garden, towards the end. It faces north, and lies beneath a huge ash tree and an enormous eucalyptus (next door's). At the end of the garden is my rickety old shed, and in front of that is a very boring dark green holly, which drops its leaves all over the place (OUCH!). The holly was a sort of blob shape, which was useful in a way, because it hid the shed.
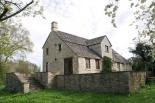
Because of the big trees, the soil was very dry. Some things would grow, but they'd always start to look a bit sad after a while. I had a trachelospermum in a large pot, which flowers every year, and a Fatshedera lizei on the fence (they grow anywhere), plus an evergreen clematis which does tend to get a bit stressed in summer. I'd like to show a "before" picture, but it was such a nondescript area, I've never really felt the urge to photograph it. You can get the idea from this photo, though. The bench marks the start of the border.

Graham's three key pieces of advice are these: add soil/organic matter; irrigate; and where necessary/possible, increase light by pruning low-growing branches.
The easiest way to add soil is to build a raised bed, or (in my case) use troughs. These days, thanks to the popularity of veg-growing, garden centres have a huge variety of troughs - wooden, plastic, collapsible, you name it. They're much bigger than conventional window boxes, which means you can get a decent amount of compost into them. I bought these two wooden ones, which were on special offer.

We're having so much rain here in the UK at the moment that I couldn't work up any enthusiasm for putting in an irrigation system. I'm too busy putting down roll-out tracks to protect the grass from my wellies. But I did decide to prune back the holly - effectively raising its crown. This had three benefits - it looked better, it let more light into the border, and it stopped the holly stabbing me in the backside every time I got the mower out of the shed.
I haven't finished pruning it, because the shed is being replaced this summer. This is also why I haven't quite finished the end of the border - there's no point doing it now if the shedmen are going to trample all over that corner in a few weeks' time.

I was very tempted to paint the wooden troughs to match my new bench, which is a colour called Honed Slate (It seems an odd name for paint used on a wooden bench, but never mind). It approximates to Cuprinol Garden Shades Muted Clay. However, I thought a light colour might be a bit intrusive, and would show every mud splash. So I painted them dark brown instead.

Planting up the troughs was easy - I had lots of things hanging about at the end of the garden looking for a home. Hostas, I find, will tolerate dry shade quite well, so long as they are planted in lots of organic matter, so they don't dry out too quickly. Maples, too, will do the same - and because this fence faces north, they get light, but very little direct sun, which is what they like.
Of course, with a trough you can mix your own compost. I added peat-free general purpose, well-rotted manure, and some ericaceous because the maples like that.

Already the troughs look quite well established (you can almost hear those hostas heave a sigh of relief. They'd been languishing next to the shed all winter). As a final touch, and to stop the containers and the bench getting too mud-splashed, I put down a mulch of pebbles beneath them. Here's Mario come to take a look at what's going on.

The roll-out paths are from Primrose and I've left mine in two bits. They are described as "instant" roll-out paths. This is a slight exaggeration. It took me quite a while to put mine together - they don't arrive as a roll-out path (which is what I thought), but as a box of slats, which are then fixed together with plastic pegs. You need very strong hands - and if you haven't got very strong hands, you need a hammer, a pair of pliers, several cups of tea, an extensive vocabulary of swear words and something entertaining to watch on telly afterwards while you calm down.
HOWEVER. They are very, very good at protecting the lawn - you can leave them down for days and the lawn doesn't go yellow. Brilliant if you're having a party, or you're going backwards and forwards across the same bit of grass.